Windows 365 custom image management

By | December 21, 2021

Introduction

With Windows 365 Enterprise, you can create a custom image to deploy a cloud PC. It requires an Azure Managed Image. This can be made from a virtual machine(VM) in Azure. However, the VM cannot be used after getting “Generalize.” In this article, I’ll go through how to ensure you can use the same VM repeatedly to update your custom image for Windows 365.

If you haven’t tried creating a custom image for Windows 365 before, you can check out my other blog post.

The issue when creating Azure Managed Image

To create an Azure Managed image, you have to “Generalize” the VM. once it’s Generalized, it will become unusable. You have to create a new VM and begin from scratch if any changes are needed. You can create a temporary VM to resolve this, but it doesn’t come without some flaws. Many steps need to be done when doing it this way. IT admins have to be comfortable managing Azure Compute resources and be aware of changes inside the portal.

To simplify things, I have created a simple PowerShell script running inside an Azure Automation account to execute the whole process of creating the temporary VM and the Azure Managed Image. We’ll come to that later on.

The manual process of creating the temporary VM

The steps below are needed to create the temporary VM and the Azure Managed Image. When you want to add something to your custom image, you’ll have to do the following:

  1. log in to the origional VM
  2. Make changes e.g. install program, language pack etc.
  3. Logout
  4. Deallocate the VM
  5. Create snapshot of virtual OSDisk
  6. Create temporary OSDisk from snapshot
  7. Create a new temporary VM based on the new temporary OSDDisk
  8. login to the temporary VM
  9. Sysprep the temporary VM
  10. Create the Azure Managed Image from the temporary VM
  11. Delete temporary VM ressources

This can easily take around 30-45 minutes each time.

The solution with Azure Automation

So what I have done is I have created a PowerShell script and uses Azure Automation that takes care of everything from step 4 to 11, this way, you can use your time of what’s essential.

If you are not familiar with Azure Automation Account and how to use it to authenticate to the Azure Services, I recommend looking at Michael Mardahl’s Blogpost.

You still have to log in to the VM, make changes, and log out. After that, run the Runbook in Azure Automation, and the magic should happen. Let’s start from the top by logging in to the VM.

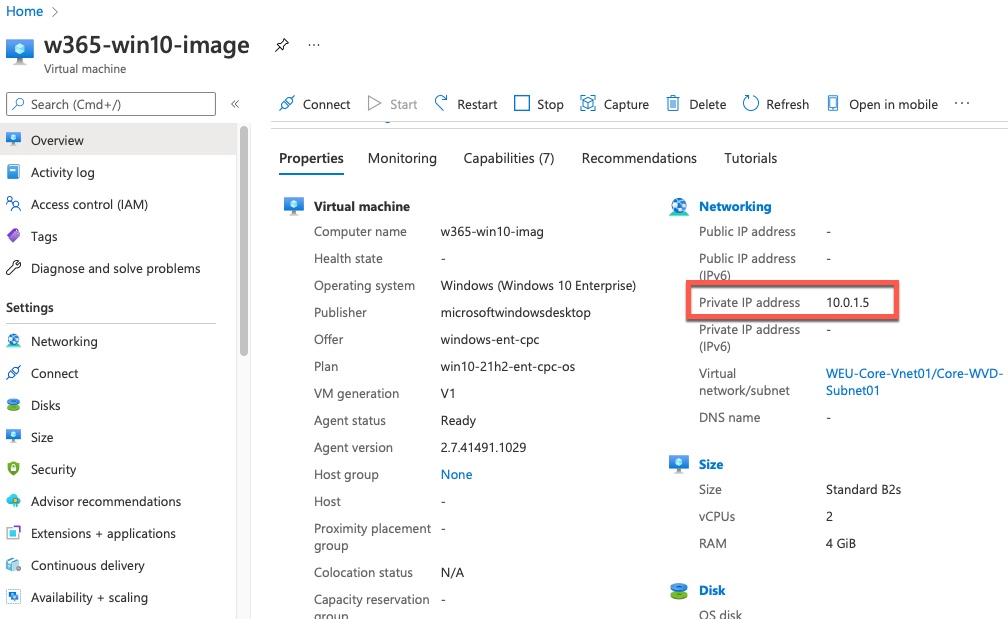
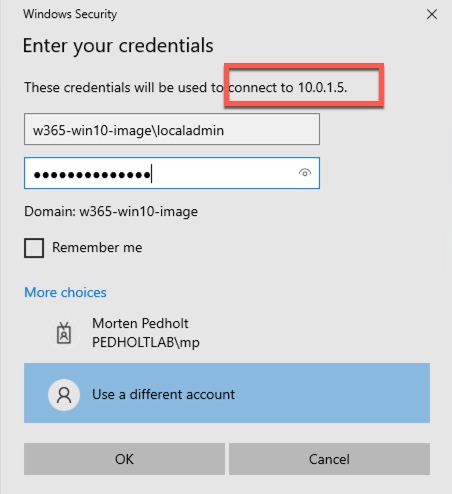
Find the Azure VM you use for your custom image and connect to it.

Customize Windows 365 image

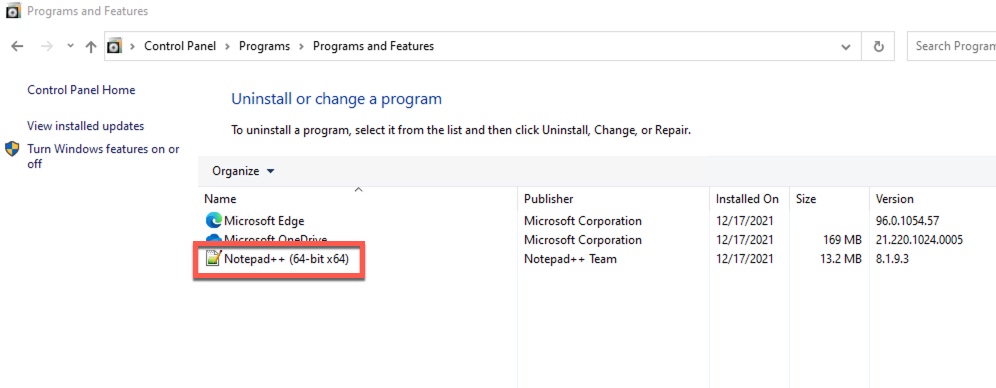
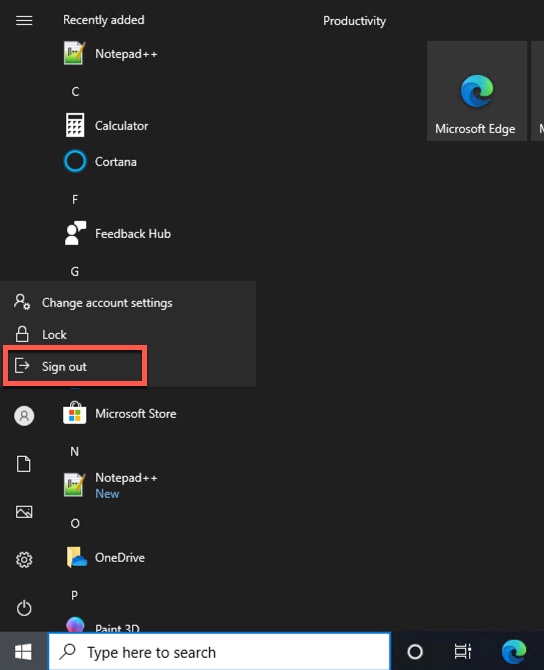
When logged into the VM, go and make the changes you need. Remember to log out when you are done.

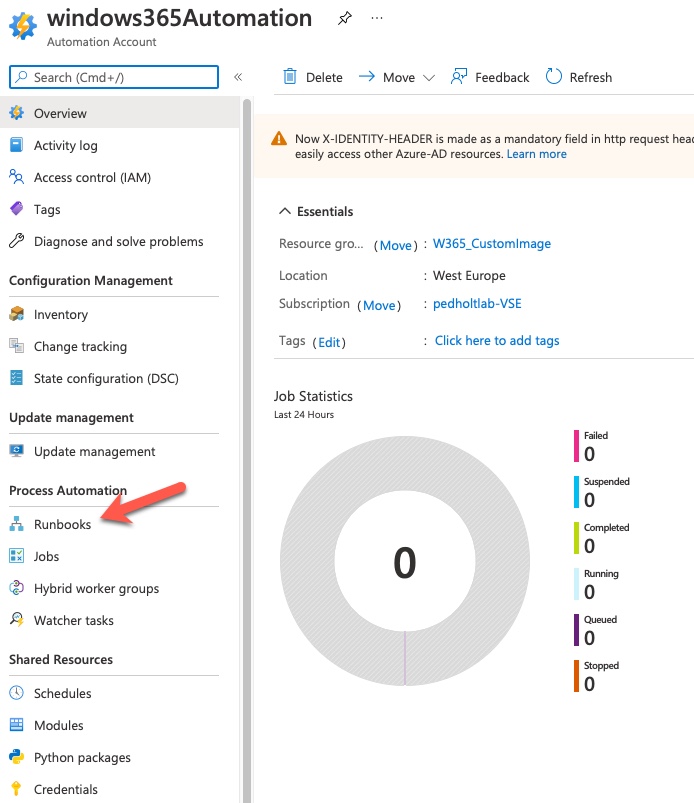
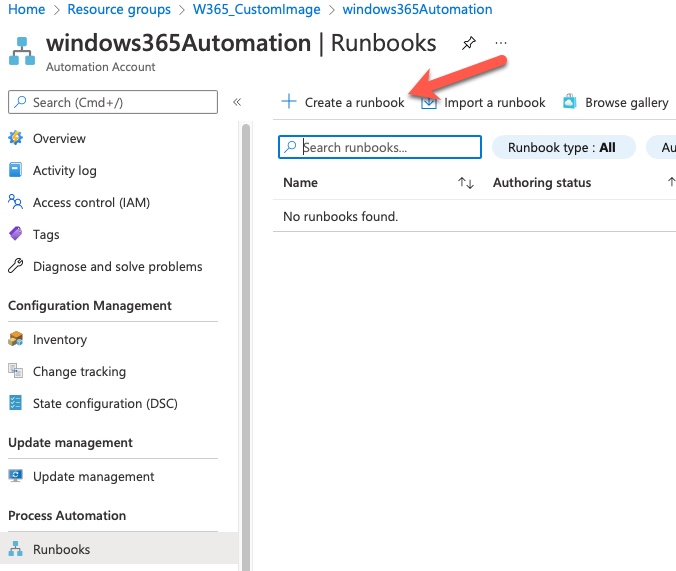
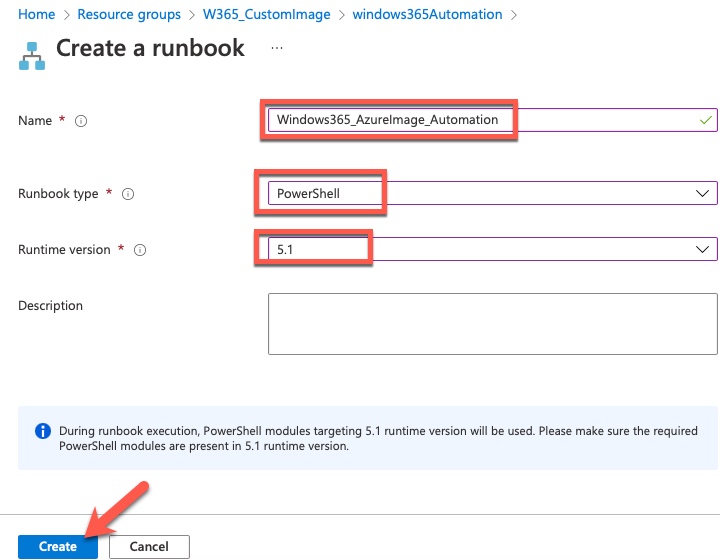
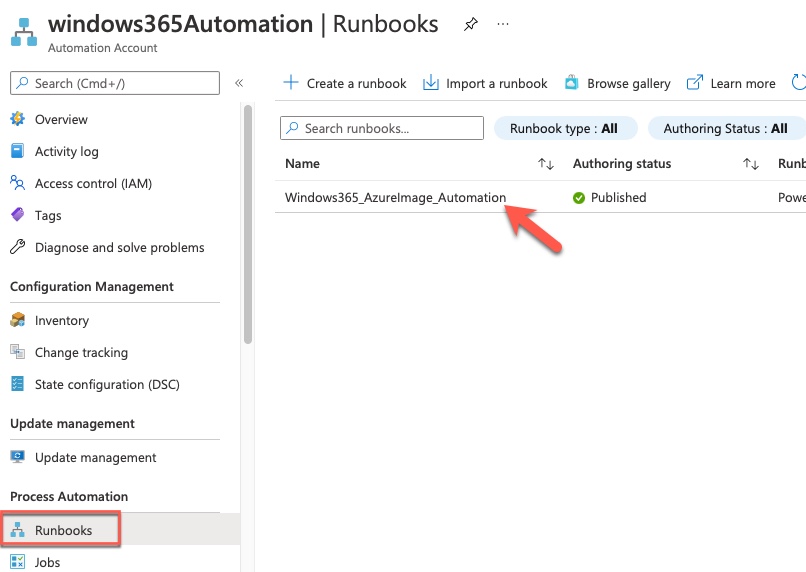
Create a new runbook in Automation Account

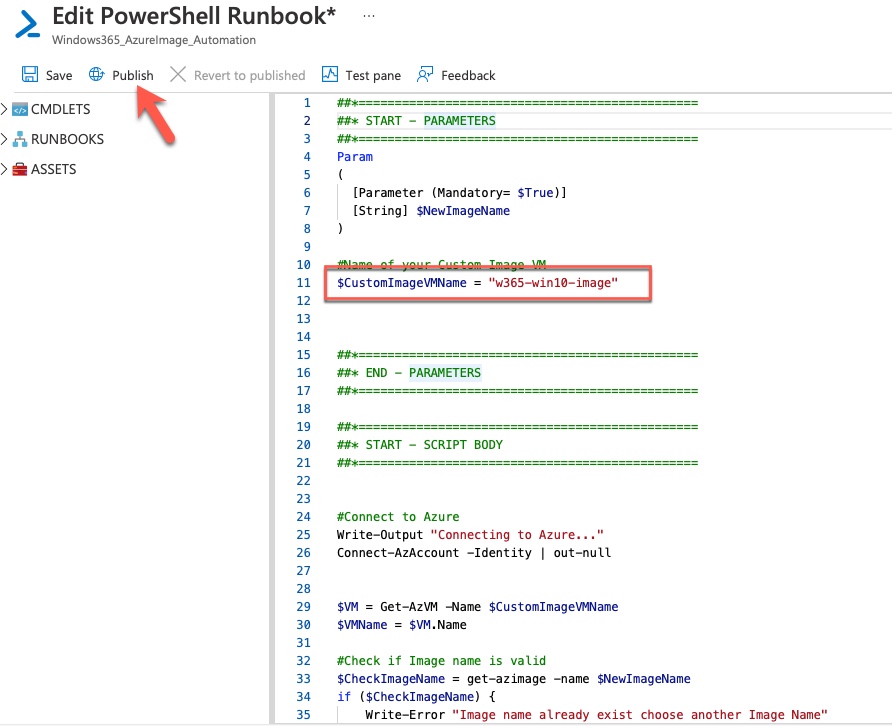
Go to your Azure Automation account, create a new runbook, and copy the PowerShell from my GitHub repo or the drop-down below. After the import, go and edit the parameter CustomImageVMName. This should be the VM name of your Custom image VM.

##*===============================================
##* START - PARAMETERS
##*===============================================
Param
(
  [Parameter (Mandatory= $True)]
  [String] $NewImageName
)

#Name of your Custom Image VM
$CustomImageVMName = ""


##*===============================================
##* END - PARAMETERS
##*===============================================
 
##*===============================================
##* START - SCRIPT BODY
##*===============================================
 

#Connect to Azure
Write-Output "Connecting to Azure..."
Connect-AzAccount -Identity | out-null


$VM = Get-AzVM -Name $CustomImageVMName
$VMName = $VM.Name
 
#Check if Image name is valid
$CheckImageName = get-azimage -name $NewImageName
if ($CheckImageName) {
    Write-Error "Image name already exist choose another Image Name"
     
 
}
 
#Check if VM is running
Write-Output "Checking if VM is deallocated..."
$VMStatus = (get-azvm -ResourceGroupName $VM.ResourceGroupName -Name $VMName -Status).Statuses.DisplayStatus
if ($VMStatus -like "VM Deallocated") {
 
    Write-Output "$VMName is already deallocated..."
 
       
}
else {
    
    Write-Output "$VMName is not deallocated, deallocating VM..."
    Stop-AzVM -Name $VMName -ResourceGroupName $vm.ResourceGroupName -Force | out-null
 
 
}
 
 
    Write-Output "Getting VM information for $VMName..."
        
    #Get Disk, and create snapshot
    Write-Output "Getting Disk information for $VMName.."
    $VMOSDiskConfig = $VM.StorageProfile.OsDisk
    $VMOSDiskName = $VMOSDiskConfig.Name
     
    Write-Output "Creating disk Snapshot"
    $SnapshotName = "$($VMOSDiskName)_SnapshotTempVM"
    $SnapshotConfig =  New-AzSnapshotConfig -SourceUri $vm.StorageProfile.OsDisk.ManagedDisk.Id -Location $VM.Location -CreateOption copy -SkuName Standard_LRS
    New-AzSnapshot -Snapshot $SnapshotConfig -SnapshotName $SnapshotName -ResourceGroupName $VM.ResourceGroupName | out-null
 
 
    #Create Temp Disk for VM
    Write-Output "Creating Temp Disk"
    $osDiskName = "$($VMOSDiskName)_TempVM"
    $snapshot = Get-AzSnapshot -ResourceGroupName $VM.ResourceGroupName -SnapshotName $snapshotName
    $diskConfig = New-AzDiskConfig -Location $snapshot.Location -SourceResourceId $snapshot.Id -CreateOption Copy
    $disk = New-AzDisk -Disk $diskConfig -ResourceGroupName $vm.ResourceGroupName -DiskName $osDiskName

    #Create Temp VM Nic 
    Write-Output "Creating Temp NIC"
    $TempNicName = "$($VM.Name)_TempNic"
    $Virtualnetworksettings = $VM.NetworkProfile.NetworkInterfaces[0].Id | Get-AzNetworkInterface
    $nic = New-AzNetworkInterface -Name $TempNicName -ResourceGroupName $vm.ResourceGroupName -Location $snapshot.Location -SubnetId $Virtualnetworksettings.IpConfigurations.subnet.id
 
        
    #Create Temp VM
    Write-Output "Creating Temp VM" 
    $TempVMName = "$($VM.Name)_TempVM"
    $VirtualMachine = New-AzVMConfig -VMName $TempVMName -VMSize $VM.HardwareProfile.VmSize
    $VirtualMachine = Set-AzVMOSDisk -VM $VirtualMachine -ManagedDiskId $disk.Id -CreateOption Attach -Windows
    $VirtualMachine = Add-AzVMNetworkInterface -VM $VirtualMachine -Id $nic.Id
    $VirtualMachine = Set-AZVMBootDiagnostic -VM $VirtualMachine -Disable
    New-AzVM -VM $VirtualMachine -ResourceGroupName $vm.ResourceGroupName -Location $snapshot.Location -DisableBginfoExtension | out-null
    $TempVM = Get-AzVM -Name $TempVMName

    Write-Output "Checking if temp VM is started..."
    $VMStatus = (get-azvm -Name $TempVMName -ResourceGroupName $TempVM.ResourceGroupName -Status).Statuses.DisplayStatus

#Timer variables
$Timer = [Diagnostics.Stopwatch]::StartNew()
$TimerRetryInterval = "10"
$Timerout = "900"

While (($Timer.Elapsed.TotalSeconds -lt $Timerout) -and (-not ($VMStatus -like "VM running"))) {
    Start-Sleep -Seconds $TimerRetryInterval
    $TotalSecs = [math]::Round($Timer.Elapsed.TotalSeconds, 0)
    Write-Output -Message "$TempVMName has not started waiting for VM to start. Task been running for $TotalSecs seconds..."
    $VMStatus = (get-azvm -Name $TempVMName -ResourceGroupName $TempVM.ResourceGroupName  -Status).Statuses.DisplayStatus
}
 
$Timer.Stop()
If ($Timer.Elapsed.TotalSeconds -gt $Timerout) {
    Write-Error "$TempVMName did not start before timeout period ending script..."
    Write-Error "Ending script"
    exit
     
}

 #Start sysprep
 $RunCommandscript =
@"

Start-Process -FilePath C:\Windows\System32\Sysprep\Sysprep.exe -ArgumentList '/generalize /oobe /shutdown /quiet'

"@

#Save Script to local file
$LocalPath = "C:\Temp"
Set-Content -Path "$LocalPath\RunCommandScript.ps1" -Value $RunCommandscript

Write-Output "Running 'Sysprep' on vm: $TempVMName"
$RunCommand = Invoke-AzVMRunCommand -VMName $TempVM.Name -ResourceGroupName $TempVM.ResourceGroupName -CommandId RunPowerShellScript -ScriptPath "$LocalPath\RunCommandScript.ps1"

     
Write-Output "Check if VM is stopped..."
$VMStatus = (get-azvm -ResourceGroupName $TempVM.ResourceGroupName -Name $TempVMName -Status).Statuses.DisplayStatus
 
#Timer variables
$Timer = [Diagnostics.Stopwatch]::StartNew()
$TimerRetryInterval = "10"
$Timerout = "900"
 
While (($Timer.Elapsed.TotalSeconds -lt $Timerout) -and (-not ($VMStatus -like "VM Stopped"))) {
    Start-Sleep -Seconds $TimerRetryInterval
    $TotalSecs = [math]::Round($Timer.Elapsed.TotalSeconds, 0)
    Write-Verbose -Message "$TempVMName has not stopped waiting for VM to stop. Task been running for $TotalSecs seconds..." -Verbose
    $VMStatus = (get-azvm -ResourceGroupName $TempVM.ResourceGroupName -Name $TempVMName -Status).Statuses.DisplayStatus
}
 
$Timer.Stop()
If ($Timer.Elapsed.TotalSeconds -gt $Timerout) {
    Write-Error "$TempVMName did not stopped before timeout period ending script..."
     
}
 
 
Write-Output "$TempVMName is stopped, Starting to deallocate it..."
stop-AzVM -Name $TempVMName -ResourceGroupName $TempVM.ResourceGroupName -Force | out-null
 
 
#Set VM to Generalized
Write-Output "Genealizing temp VM."
Set-AzVm -Name $TempVMName -ResourceGroupName $TempVM.ResourceGroupName -Generalized | out-null
 
#Create managed Image
Write-Output "Creating Azure Managed Image from temp VM"
$GeneralizedVM = Get-azvm -name $TempVMName -ResourceGroupName $TempVM.ResourceGroupName
$image = New-AzImageConfig -Location $GeneralizedVM.location -SourceVirtualMachineId $GeneralizedVM.Id -HyperVGeneration V2
New-AzImage -Image $image -ImageName $NewImageName -ResourceGroupName $GeneralizedVM.resourcegroupname | out-null
 
#Delete Temp ressources
Write-Output "Removeing Temp Ressources"
Remove-AzVM -Name $TempVM.Name -resourcegroupname $TempVM.ResourceGroupName -Force
Remove-AzDisk -DiskName $tempvm.StorageProfile.OsDisk.Name -ResourceGroupName $TempVM.ResourceGroupName -Force
Remove-AzNetworkInterface -Name $TempNicName -ResourceGroupName $TempVM.ResourceGroupName -Force
Remove-AzSnapshot -SnapshotName $SnapshotName -ResourceGroupName $TempVM.ResourceGroupName -Force


Remove-Item -Path "$LocalPath\RunCommandScript.ps1"
##*===============================================
##* END - SCRIPT BODY
##*===============================================  

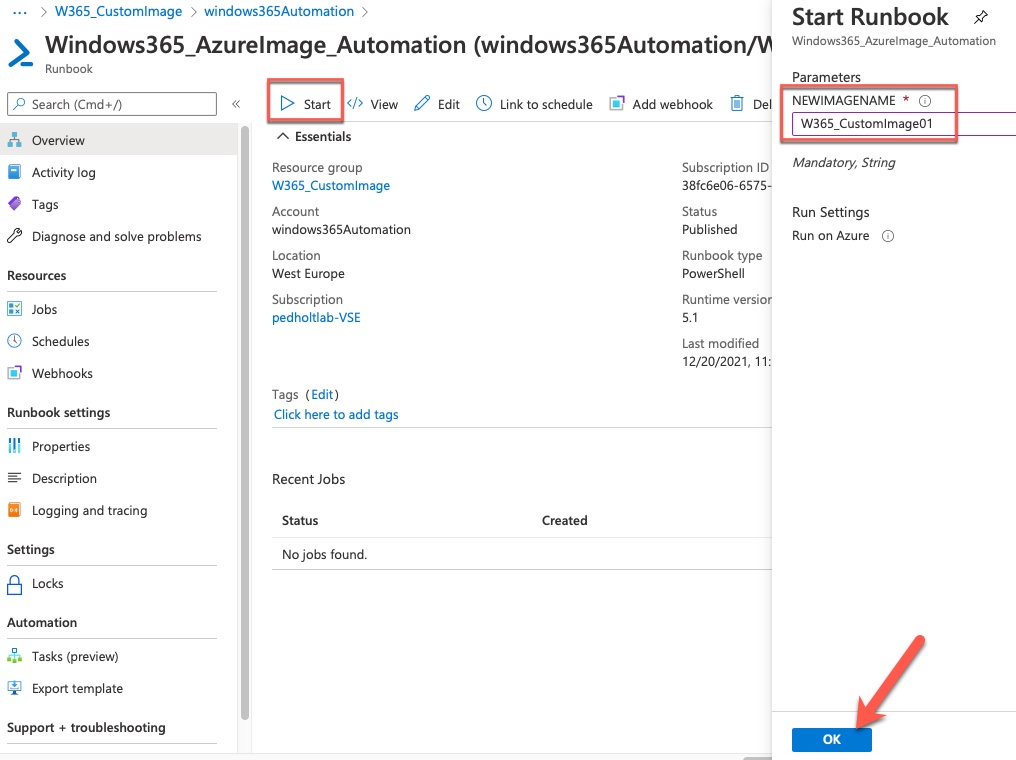
Running the runbook and check the result

When starting the Runbook, you’ll have to choose what the name of the Azure Managed Image should be. You cannot use the same name twice for a Managed Image. Don’t worry. The script will check if the name is available.

Windows 365 Custom Image management

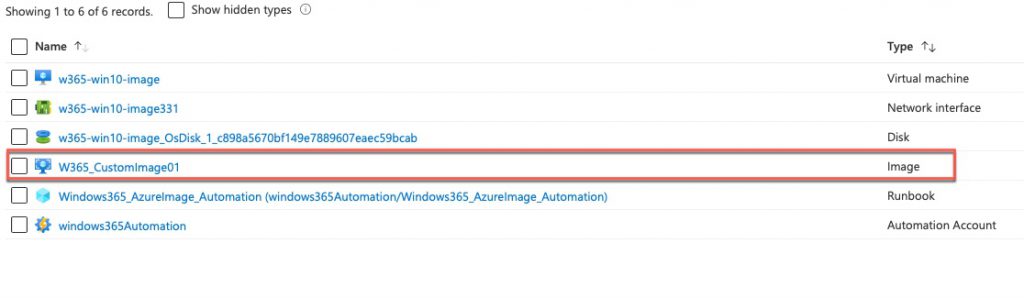
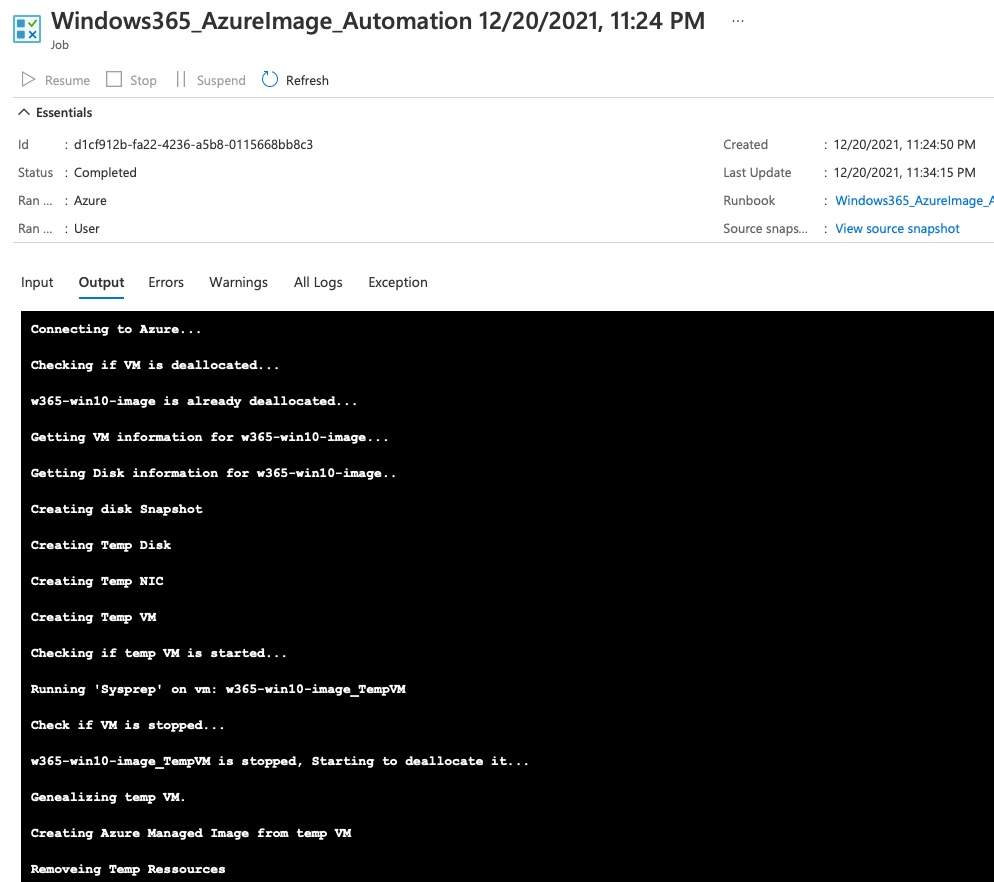
When the Runbook has been completed, you can see that an Azure Managed Image has been created inside the same resource group as your Custom Image VM. You can also see the creation process by checking the completed job in Azure Automation.

Windows 365 Custom Image management

Upload custom image to Windows 365

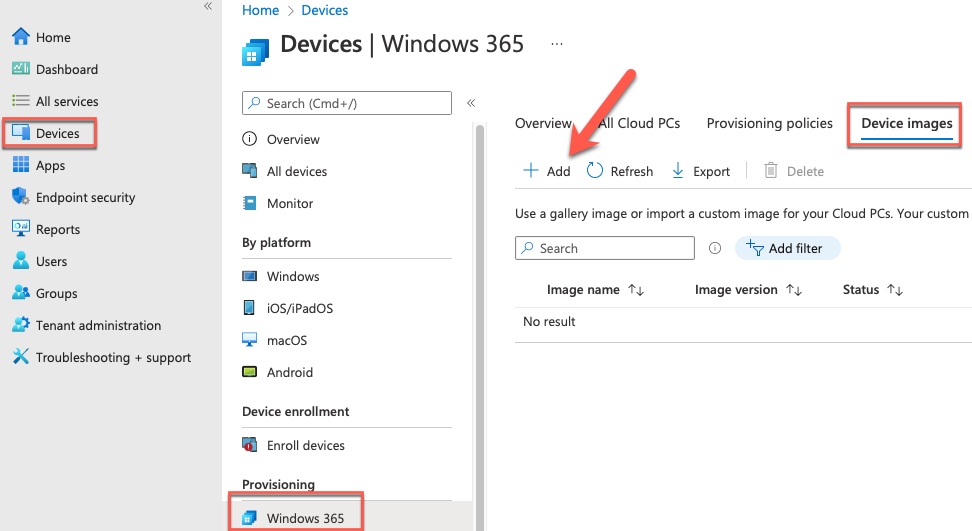
The last thing you have to do is upload the new Image to Windows 365. head to https://endpoint.microsoft.com and go in and Add a device image.

Windows 365 Custom Image management

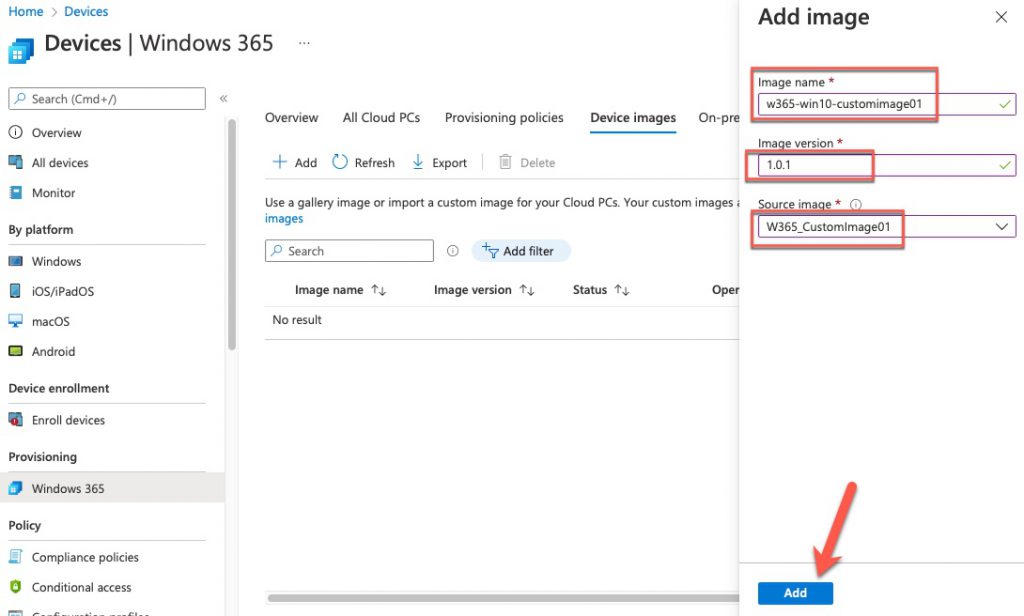
Fill out the information about Image Name, Image Version and select your new Managed Image.
After you click Add the custom Image will upload, and you can assign it to a provisioning policy.

Windows 365 Custom Image management

Final thoughts

Automating a process like this makes everything much more manageable. This way, the process of creating the Custom Image will be documented, and you don’t have to remember detailed information about the setup. This method can also be used for other purposes, such as Azure Virtual Desktop image management.

One thought on “Windows 365 custom image management

  1. Pingback: Weekly Newsletter – 19th to 23rd December 2021 - Windows 365 Community

Leave a Reply

Your email address will not be published.